

What is a good flute hand position? A picture is worth a thousand words. Earlier this year I wrote about a couple of my flute pet peeves. Here is another pet peeve…not playing with a good hand position.
But first, let’s talk about WHY a good hand position is important.
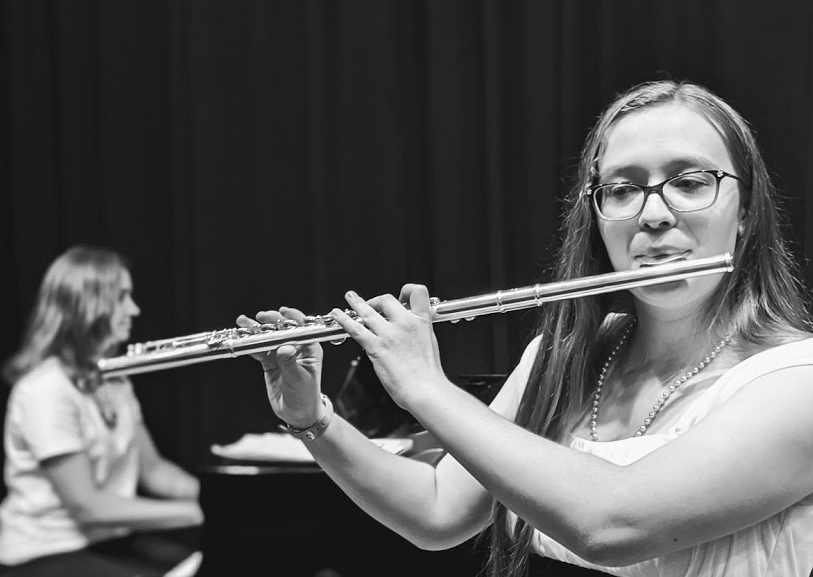
I believe that if you have a natural, relaxed hand position and keep your fingers close to the keys then it makes your playing sound more clean. What’s good about the example in the picture above? Fingers have a natural curve, they are properly centered on the keys, and the left thumb is straight and pointing upward.
The most important thing with your hand position is to stay as relaxed as possible. Having a former teacher with serious hand problems and experiencing some of my own through the years, it has reinforced to me the critical need for a proper hand position.
Right hand thumb is under the index.
If you drop your right hand to the side and stand relaxed, notice your natural hand position. Where does the thumb naturally fall? For everyone I’ve ever taught, the thumb naturally falls in front of the index finger. Bring that naturally shaped hand position upward and insert your flute, keeping the right thumb under the index finger as shown in the photo above. Be careful to not let it poke out too much. It should be under the flute to help support and balance the flute.
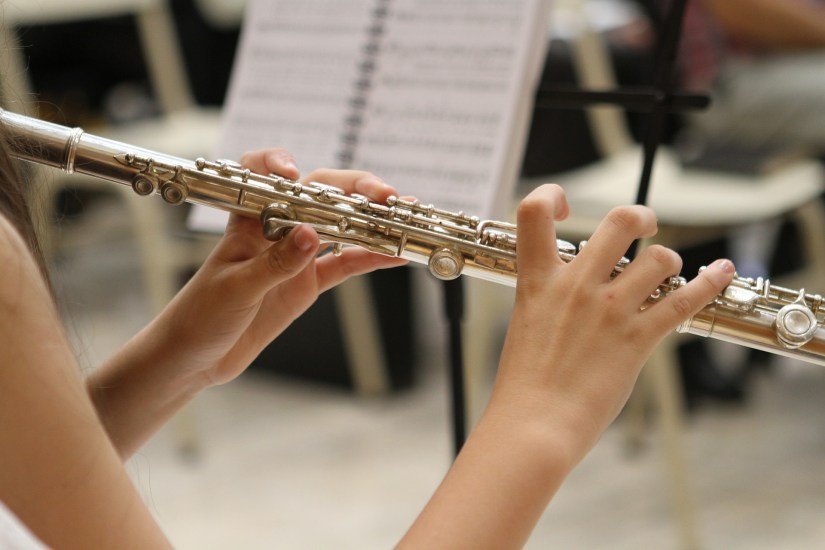
Left hand thumb is straight and pointed upward.
While it is necessary to curve the left index finger, the left thumb should be straight and pointed upward. I used to play with a bent left hand thumb. Then one of my teachers suggested to keep it straight since that is a more natural position. I’ve never gone back to a curved left hand thumb. It feels so much more relaxed being straight instead of curved.
While the above photo shows a good placement of the left hand thumb, the right hand fingers fall into the category of what I call “flying fingers”.
These two photos below demonstrate the fingers flying high away from the flute and they also show how some of the other fingers are not even close to the keys. The photo on the left shows the left hand placed too far up the flute. (But how nice of her friend to act as a music stand so she can practice outside. Way to go, girls. Nice teamwork!) The ring finger and pinky are too far away from the keys they will depress. The photo on the right shows even more dramatically what NOT to do with your left hand ring finger and pinky. Notice how they are not even near the keys.

When the fingers are placed on the flute, they should be curved and relaxed with the finger tips or fleshy part of the finger resting just barely above the center of the keys. To work on this concept try playing your favorite scale while keeping your fingers actually touching the keys when you lift them up and that will help you understand what little movement is needed to change notes. The goal should be minimal movement of the fingers.
Even though this image below is computer generated, it gives a good example of a proper hand position.

In conclusion:
- Keep fingers as naturally shaped as possible.
- Limit any unnecessary tension in the hands and fingers.
- Curve the fingers.
- Keep the right hand thumb directly under the index finger and slightly pulled back.
- Keep the left hand thumb straight and pointing upward.
- When playing, keep the fingers close to the center of the keys and avoid flying fingers.
- Above all, remember that a relaxed position is a better position.
Let a mirror be your best friend when trying to improve your flute hand position. Good luck!
